A Christmas living room comes together in four layers: tree, mantel, soft furnishings, and lighting. Get those four right in that order and the room reads professionally styled, regardless of budget or square footage. This guide covers 75 specific ideas organized by zone, with measurements and product guidance drawn from real decorated rooms.
Start with the tree
The tree is the largest single piece of decor in the living room, so its location dictates everything else. Commit to placement before unpacking a single ornament.
1. Pick the corner most visible from your seating
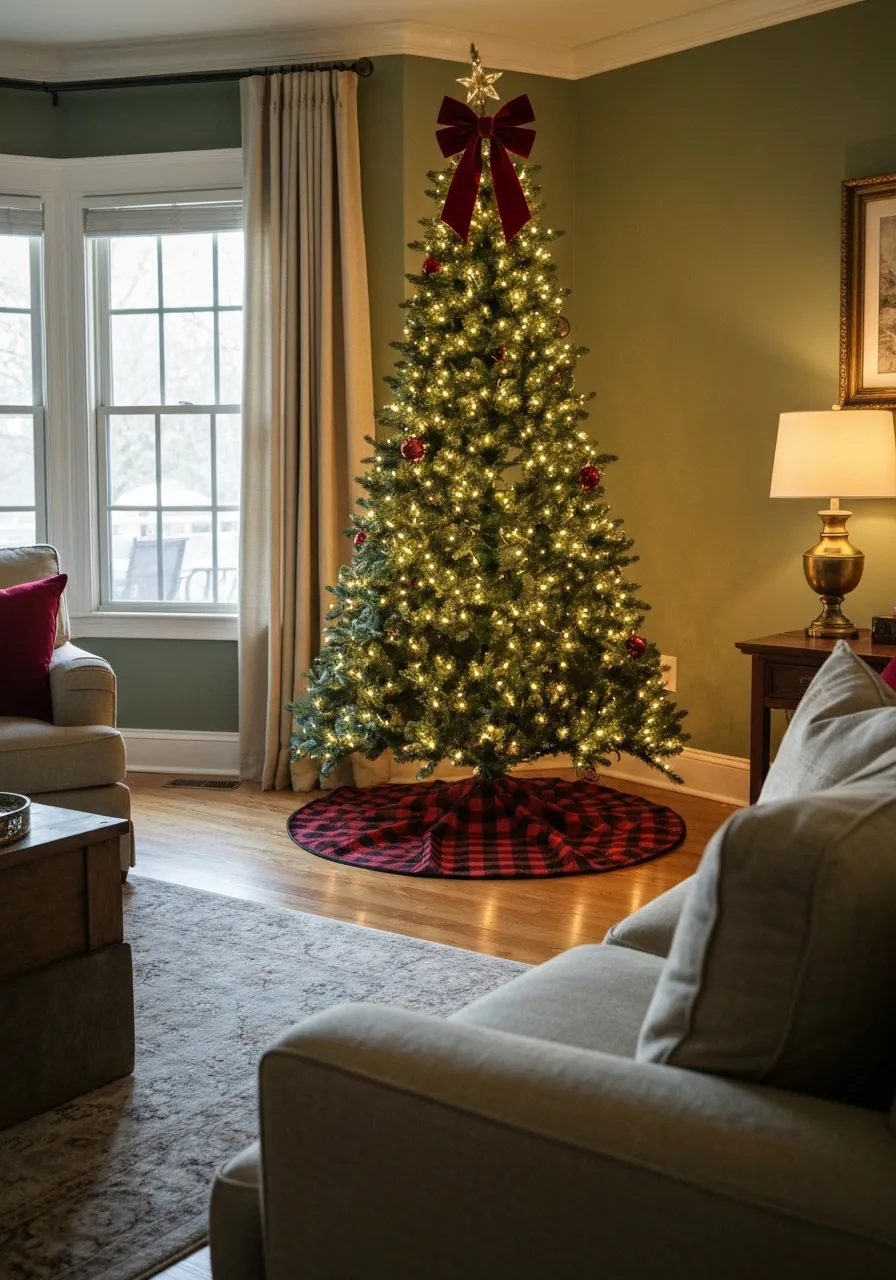
Walk to your sofa, sit down, and look up. The corner your eye lands on first is where the tree belongs. Most living rooms have one dominant view angle, usually the corner diagonal from the sofa. A tree placed there anchors the room without blocking traffic flow or competing with the television.
2. Match tree height to ceiling clearance
For a 9-foot ceiling, a 7-foot tree is the sweet spot, full enough to anchor the room without overwhelming it. For 8-foot ceilings, choose a 6-foot tree or a 7-foot slim pencil variety. Leave 12 to 18 inches between the topper and the ceiling so the topper reads as a design element rather than an afterthought. For ceilings above 10 feet, a 7.5-foot or 9-foot tree fills the vertical space properly.
3. Choose the topper before buying any ornaments
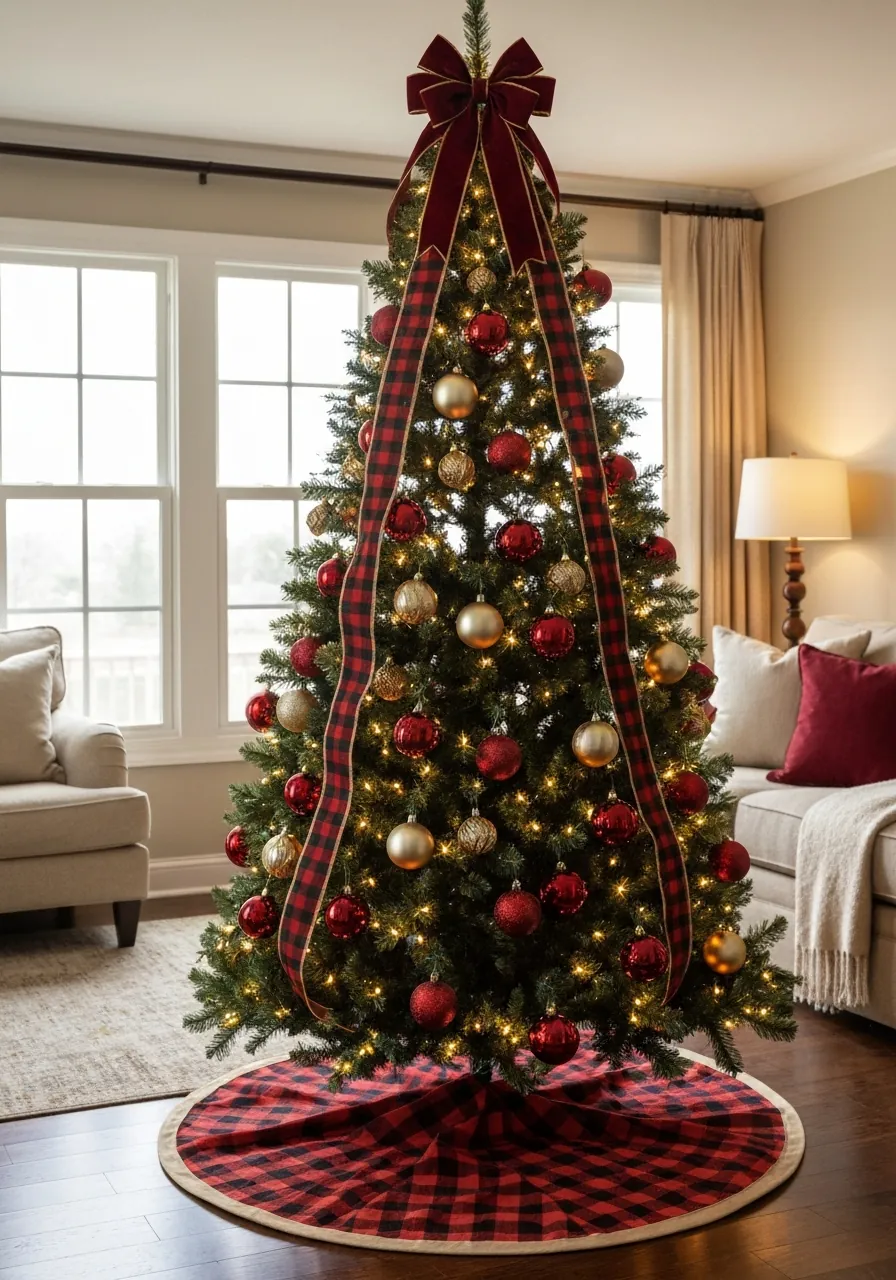
The topper sets the visual weight and style of the entire tree. A large velvet fabric bow topper signals traditional warmth. A sculptural metal star in brushed gold reads modern and minimal. A lantern topper works for farmhouse and rustic styles. A feathered angel or heirloom figurine suits a classic holiday aesthetic. Once the topper is chosen, every ornament purchase should support that tone.
4. Fluff the tree for 20 minutes before adding lights
On artificial trees, separate every branch tip and bend outer tips slightly downward and outward. Inner branches should angle upward to create depth. A well-fluffed 7-foot tree has roughly 900 individual branch tips, all of which need to be separated. The fluffing step makes more visual difference than any ornament or ribbon added afterward. Skip it and the best decorations in the world will sit on a flat silhouette.
5. Layer lights from trunk to tip, not tip to trunk
Start at the base near the trunk and spiral outward toward the branch tips. This places the light source deep in the tree, creating a warm glow that looks like it emanates from within rather than sitting on the surface. For a 6-foot tree, 300 to 400 warm white LED lights. For a 7.5-foot tree, 500 to 600. For a 9-foot tree, 700 to 900. Step back after each section and fill any dark patches before moving higher.
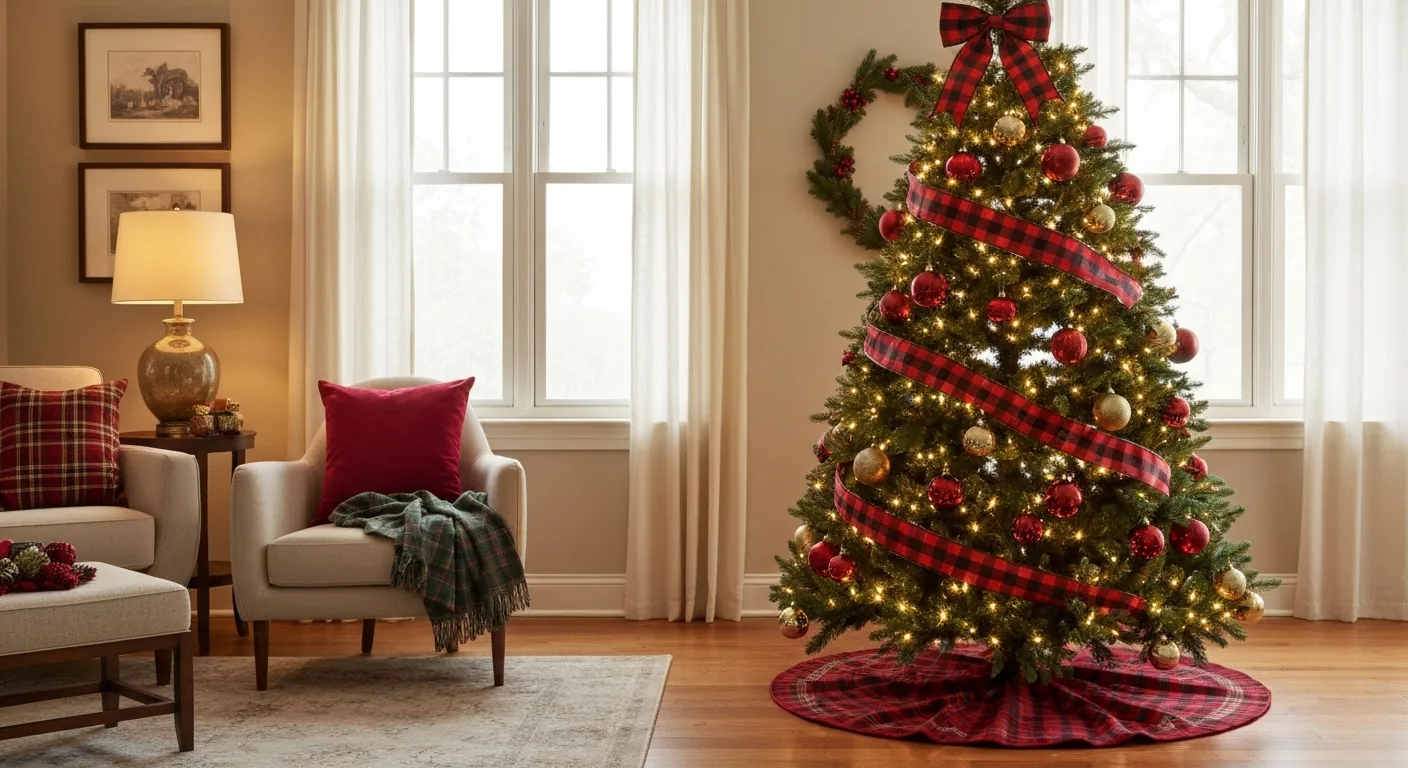
6. Use the vertical ribbon technique for maximum fullness
Cut wired ribbon into 18-inch sections. Starting at the top of the tree, tuck one end of each section into the branch near the trunk and let the ribbon loop out to a mid-branch tip before tucking the other end in. Work vertically down the tree rather than spiraling diagonally. This creates waterfall-style loops that read full from every angle. A 7-foot tree needs 15 to 18 ribbon sections using 2.5-inch wide wired ribbon.
7. Place ornaments in three size tiers
Large ornaments go deep inside the tree near the trunk to create visual depth. Medium ornaments sit at mid-branch positions. Small ornaments and picks go at branch tips. The ratio for a balanced tree is roughly 1 large to 3 medium to 6 small. Cluster ornaments in threes rather than spacing them evenly, three same-color ornaments in different sizes grouped on adjacent branches look intentional where evenly-spaced ornaments look like a count rather than a design.
8. Anchor the tree with a skirt that connects to the room
The tree skirt, or tree base treatment, closes the visual gap between the tree and the floor. A buffalo plaid skirt in the same colors as the ribbon unifies the whole display. A woven basket concealing the pot reads farmhouse. A linen skirt trimmed in velvet works for a more formal aesthetic. Size matters: a 7-foot tree needs a 48-inch skirt to fill the visual footprint properly.
Style the mantel as the second focal point
The mantel is the second-largest visual moment in most living rooms. A poorly styled mantel undermines even a beautifully decorated tree. The goal is to build a scene, not a lineup.
9. Start with one focal piece at the center back
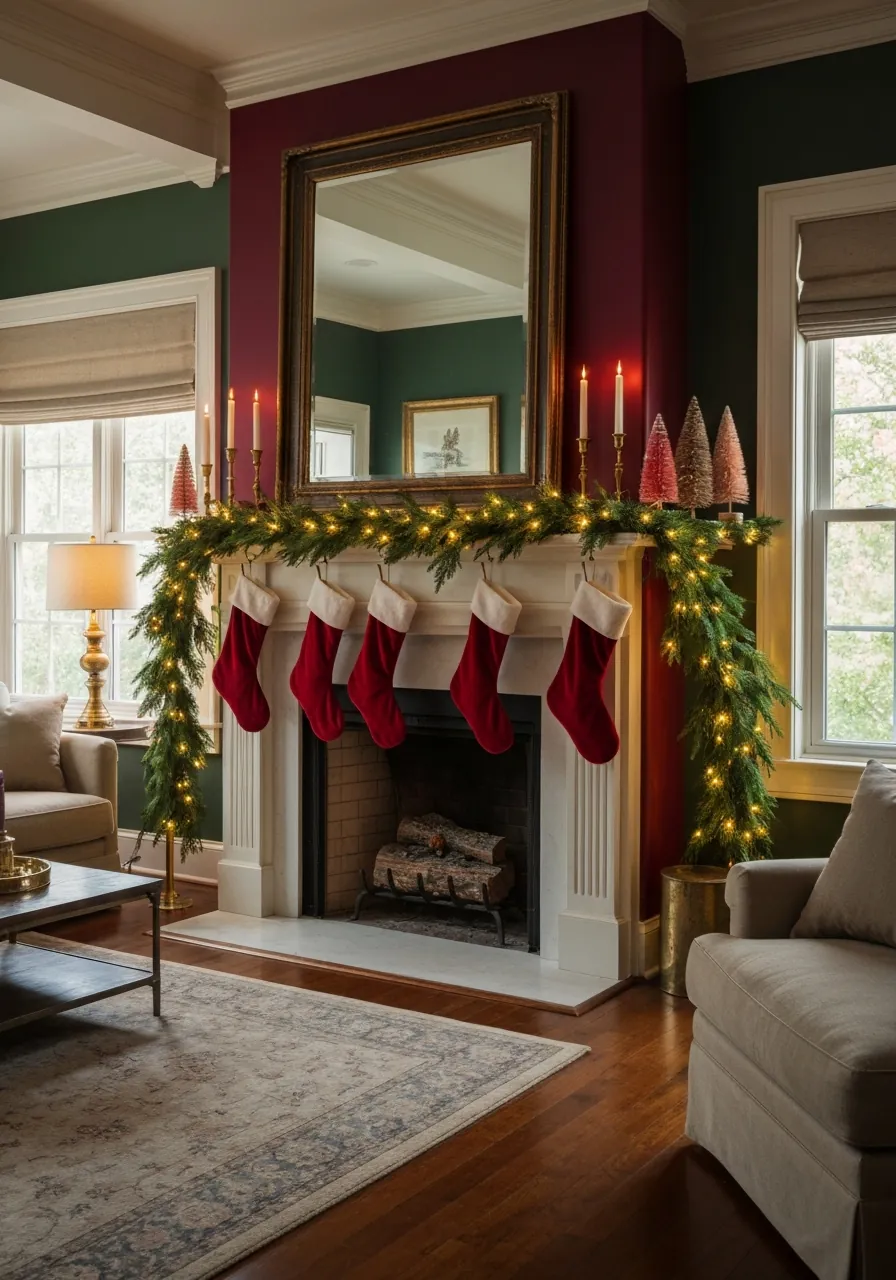
Mount or lean one dominant piece at the center of the mantel: a large mirror, a piece of seasonal art, a chalkboard with a hand-lettered phrase, or a framed botanical print in a merlot mat. This focal piece gives the eye a landing point and sets the scale for everything else. The focal piece should be at least 24 inches wide for a standard 60-inch mantel, and at least 30 inches wide for a mantel 72 inches or longer.
10. Drape garland that extends six to eight inches past each end
A garland that ends at the mantel edge looks contained and small. Extend it six to eight inches past each side so it appears to flow off the edges of the mantel. For a 60-inch mantel, use a 9-foot garland with the center draped 3 to 4 inches below the mantel front. For a 72-inch mantel, a 12-foot garland gives proper coverage. Use floral wire or zip ties to secure the garland to small cup hooks mounted underneath the mantel shelf, invisible from below.
11. Build balanced height on both sides
After the garland is secured, place one tall item on each end: a candlestick, a lantern, a small bottle-brush tree, or a stack of books topped with a small wreath. Both sides do not need to be identical, but they should read as roughly the same visual weight from across the room. A 12-inch candlestick on the left and a 10-inch bottle-brush tree on the right work because both are vertical and similar in height. A 12-inch candlestick on the left and a 3-inch tealight holder on the right creates a lopsided display.
12. Fill the middle zone with intentional objects
Between the garland and the focal piece, place two or three decorative objects in a loose triangle: a mercury glass votive, a small brass reindeer, a pinecone cluster in a bowl. The objects should vary in height and material. Group them so they overlap slightly when viewed straight on, which creates visual depth. Leave space between groups rather than crowding the entire mantel surface.

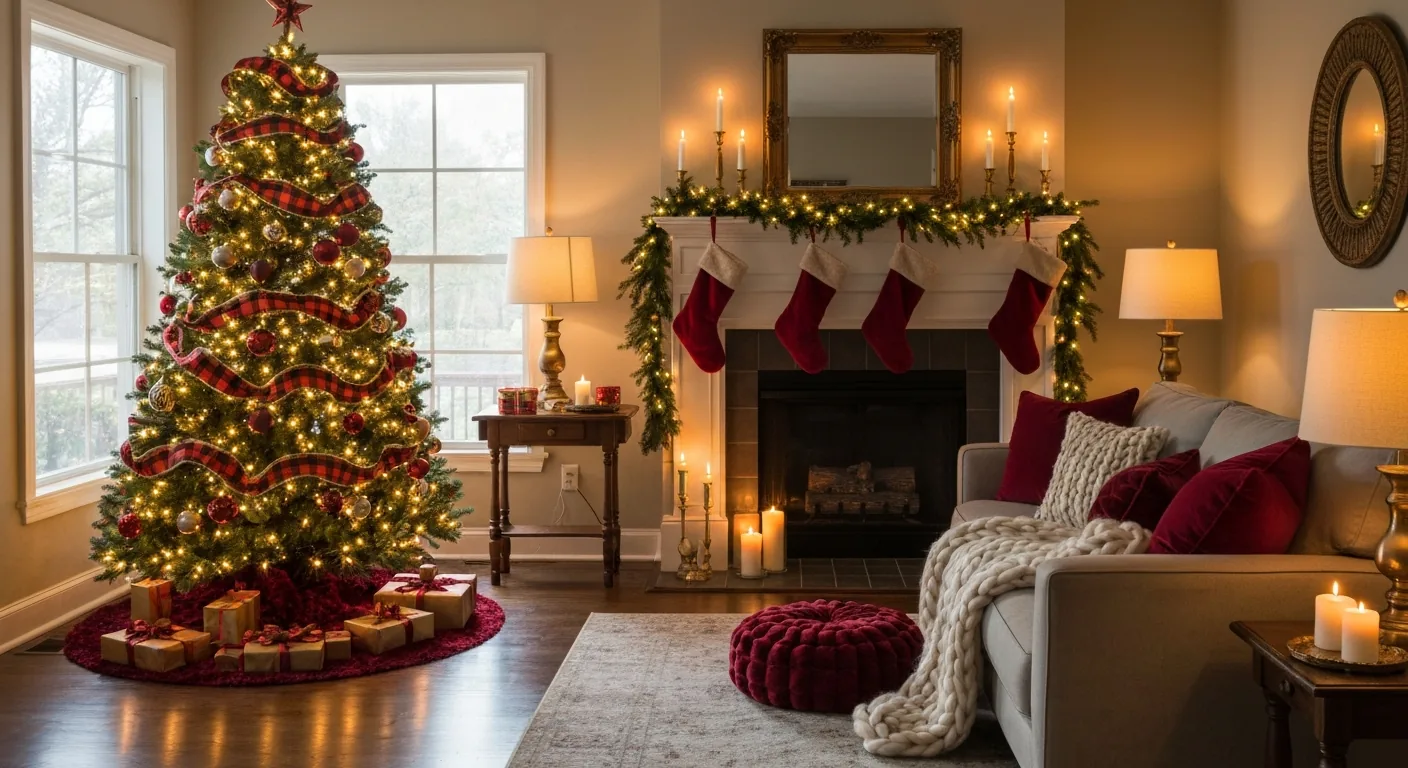
13. Hang stockings at measured intervals, not random spacing
If stockings hang from the mantel, measure equal spacing before hanging. For four stockings on a 60-inch mantel, space the hooks at 10, 20, 30, and 40 inches from the left edge. Stocking hooks that match your metal finishes, brushed gold, matte black, or antique brass, look more intentional than mismatched hooks. Stuff the top of each stocking with tissue paper so it holds its shape even before gifts go in.
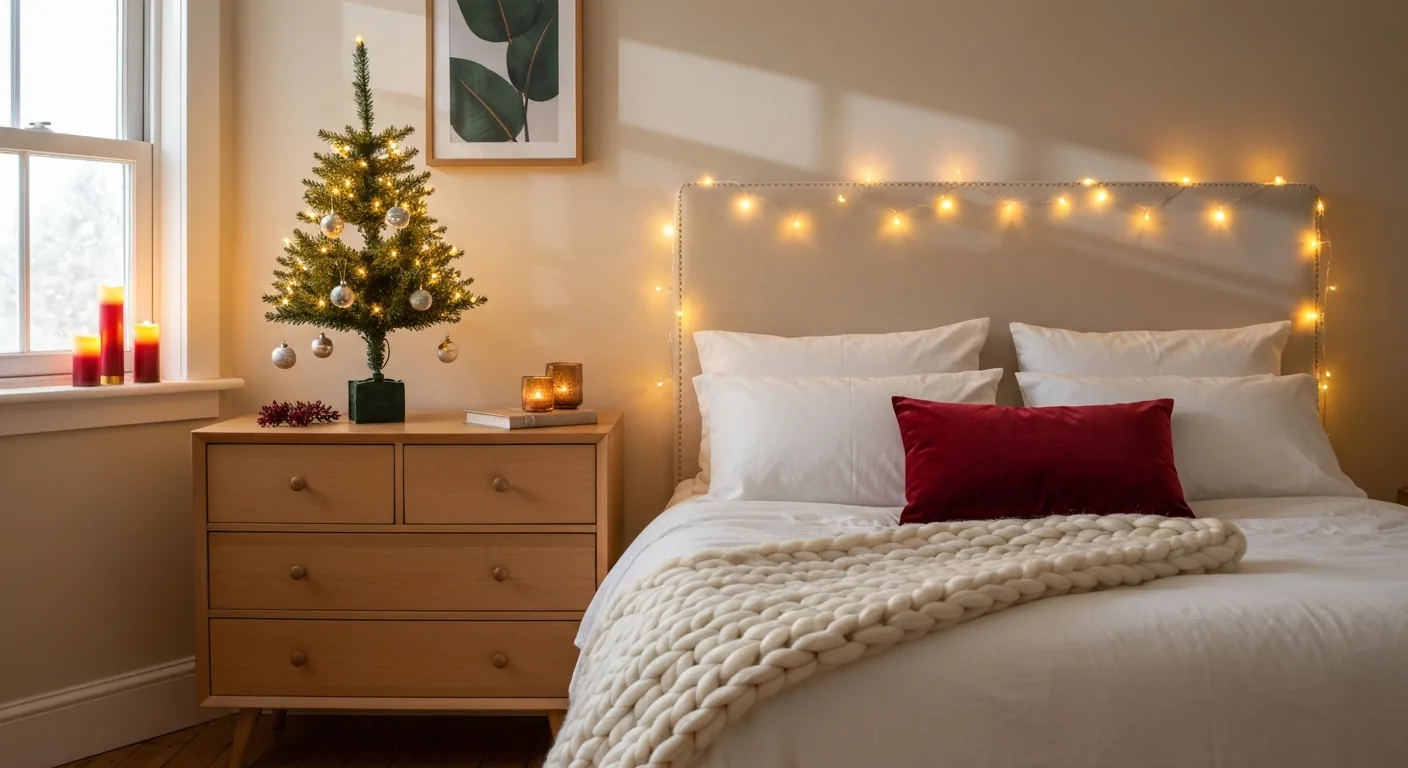
14. Wire in subtle twinkle lights for evening drama
Wrap a single strand of 100 warm white lights through the garland before hanging it on the mantel. When the room lights dim in the evening, the mantel becomes the warmest, most atmospheric moment in the room. Battery-operated lights with a timer eliminate the need for an extension cord running down the wall.
Layer the soft furnishings
The sofa, chairs, and coffee table form the inhabited center of the living room. Decor here should feel welcoming and livable, not precious or untouchable.
15. Three textures on the sofa, no more
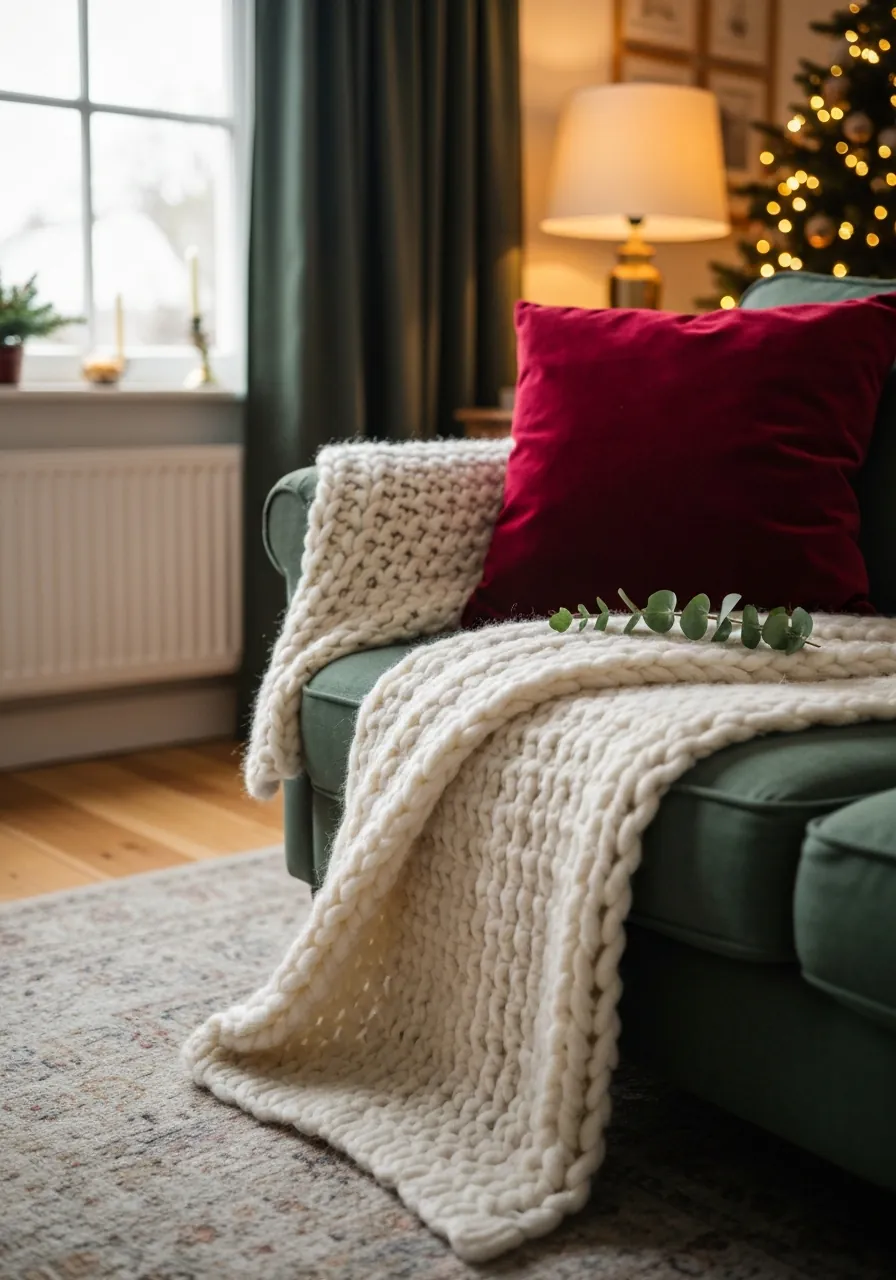
Wool throw, velvet pillow, and one natural element. This three-texture rule prevents the sofa from looking either bare or cluttered. The wool throw (a chunky knit or herringbone wool in cream, oatmeal, or plaid) goes draped over one arm or loosely folded across one cushion. The velvet pillow, in merlot, forest green, or deep navy, goes against the back cushion where it catches the light. The natural element is a single sprig of eucalyptus, a small pine branch, or a rosemary sprig tucked into the cushion seam or into the throw fold. The restraint is what makes it photograph well.
16. Add one seasonal throw to the reading chair
A plaid flannel throw in the chair nearest the tree adds warmth and completes the seating scene without overstuffing the room. Drape it across the arm or fold it loosely across the seat so it reads as used rather than staged.
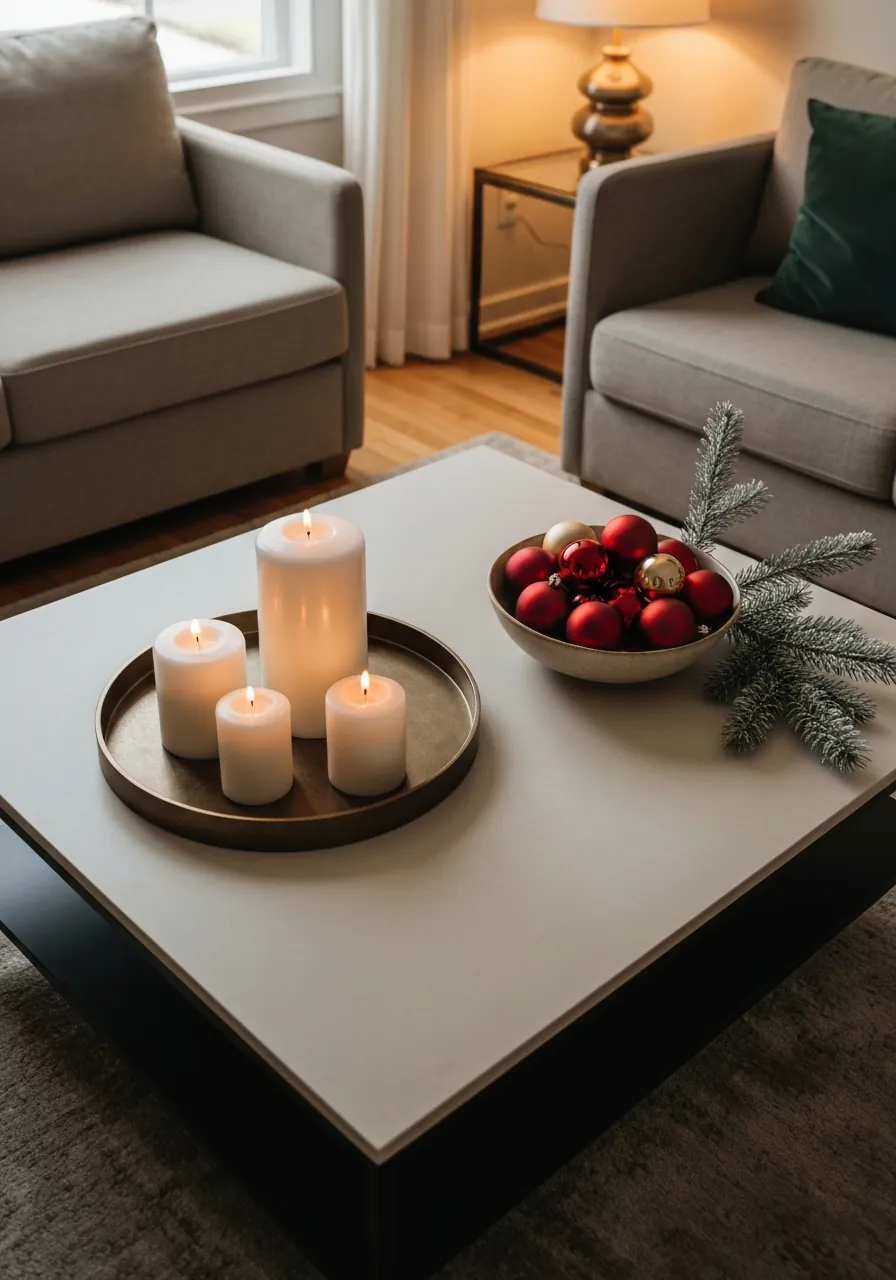
17. Style the coffee table as a low centerpiece
The coffee table is the horizontal focal point of the seating area. Keep it simple: one tray holding a cluster of candles in varying heights, a small bowl of ornaments, and a short winter branch. Or a stack of hardcover books topped with a wax-coated apple, a small pine cone, and a single cinnamon stick. The objects on the table should sit below the sightline of seated guests so they do not block conversation.
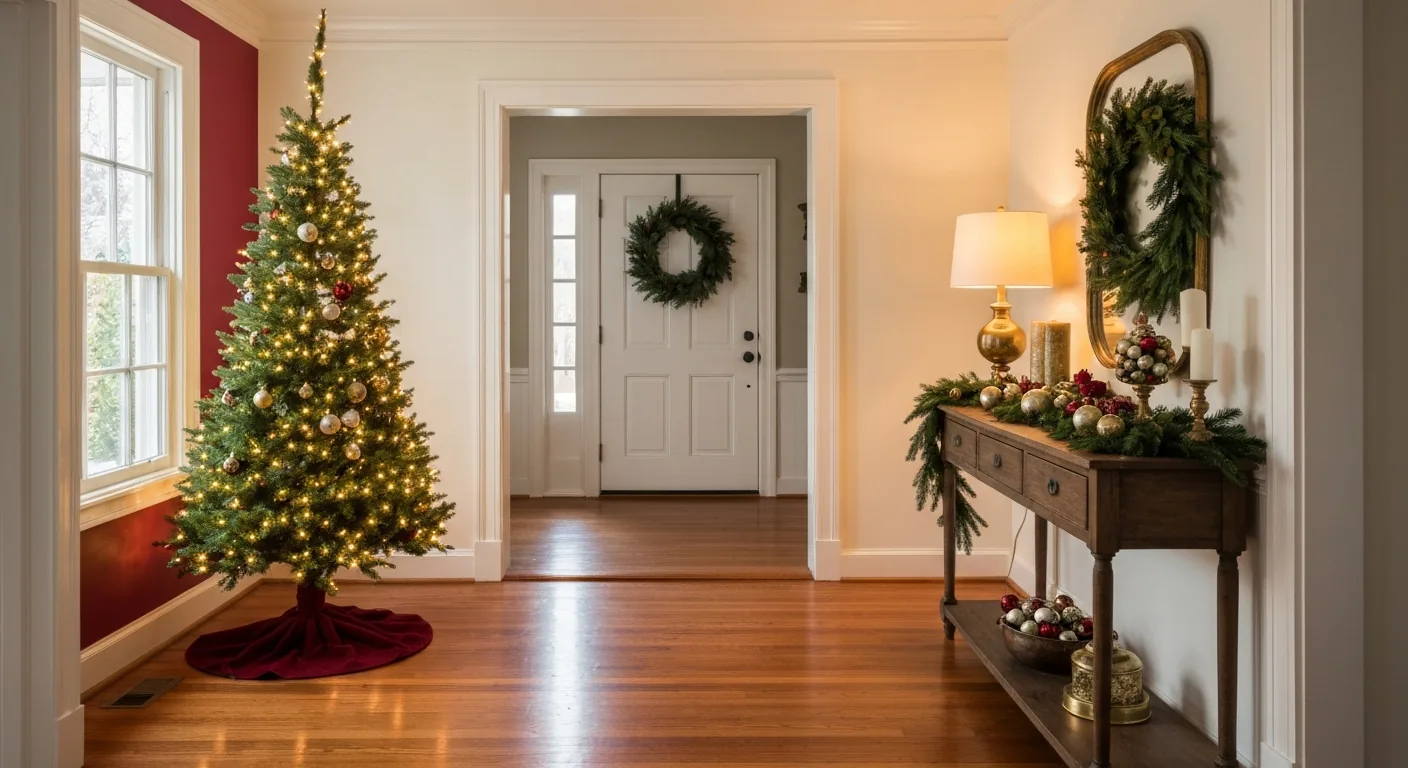
18. Use a natural garland on the console table or bookshelf
A real or faux eucalyptus and pine garland draped across a console table or along a bookshelf shelf adds greenery without competing with the main tree. Let it pool slightly at each end. Add a few small ornaments clipped directly to the garland branches for color continuity with the tree.
19. Bring in red and green through small object placements
A red berry stem in a bud vase on the end table, a small evergreen wreath hanging inside a picture frame, a set of brass reindeer figurines on the windowsill. These small placements reinforce the color story established by the tree without requiring additional large purchases.
Light the room
Lighting is where most living room Christmas decor falls flat. A single overhead fixture washing everything in the same light level erases the depth that tree lights, candles, and window lights create.
20. One warm white light source per six feet of floor space
Count the light sources in the room: tree lights, table lamps, floor lamps, candles, fireplace, window candles, and any garland lights. Divide the room’s square footage by 36. That is roughly how many distinct light sources create the layered glow associated with professional holiday staging. A 12-foot by 15-foot living room needs approximately five separate light sources at different heights.
21. Dim the overhead fixtures to 30 percent after dark
The overhead light competes with every warm-toned source in the room. Dimming it to 30 percent of its full brightness allows the tree, the candles, and the lamp light to read as the primary sources. If the overhead is on a switch rather than a dimmer, turn it off entirely in the evening and rely on the accumulated warmth of the other sources.
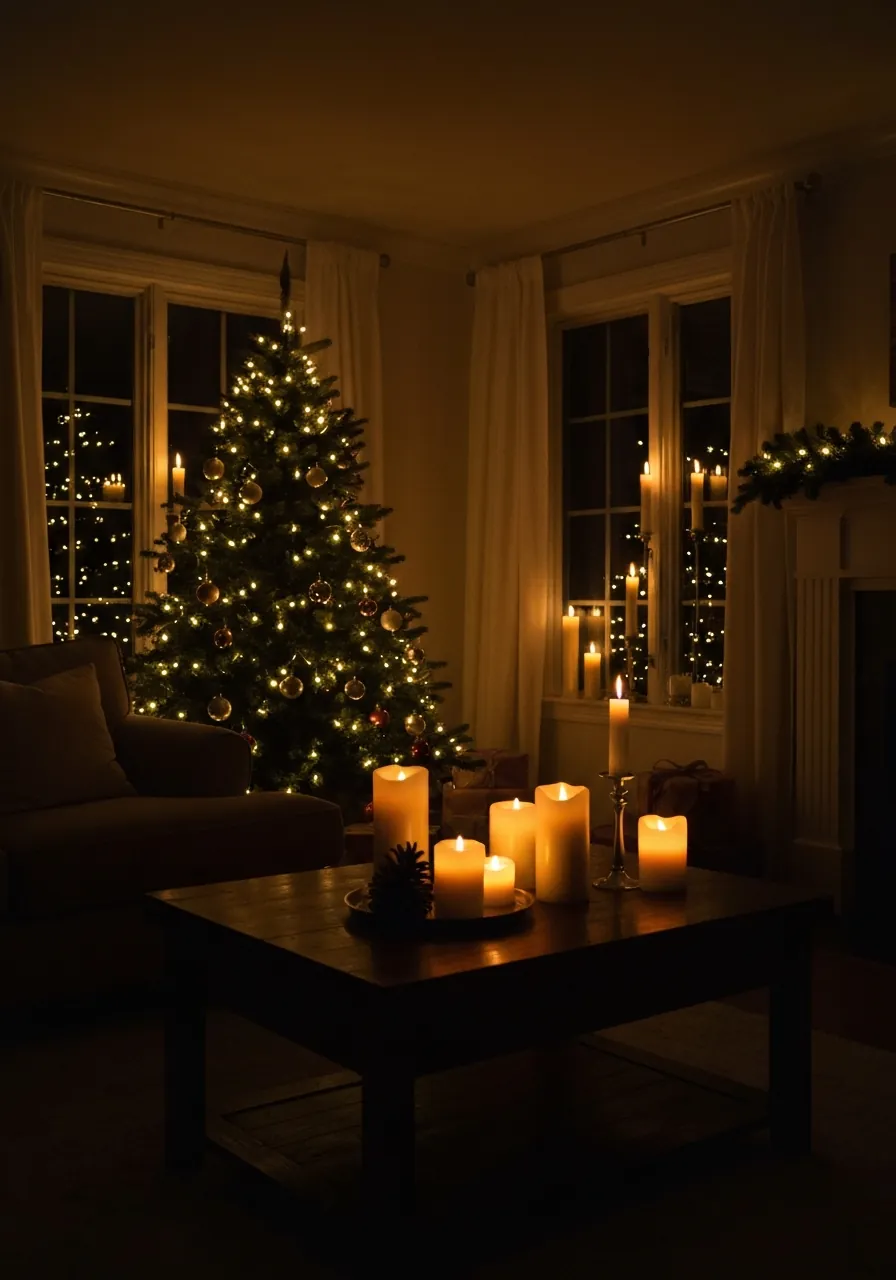
22. Place window candles in every front-facing window
Battery-operated LED taper candles in the window sills signal a decorated home from the street and add warmth inside. Choose candles with a warm flame flicker effect rather than a static LED glow. Set them on a timer to turn on at dusk and off at midnight. A standard window takes one 9-inch or 10-inch candle centered on the sill.
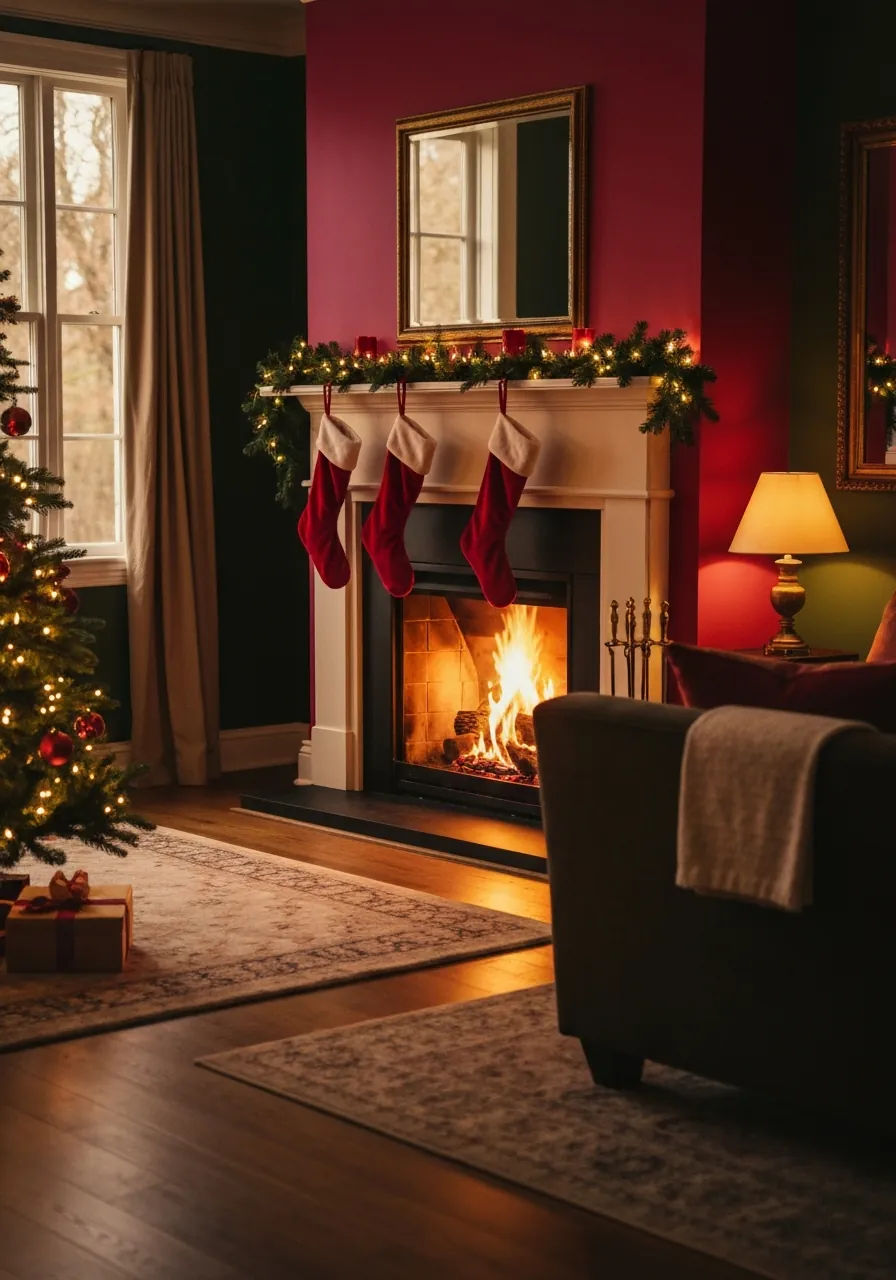
23. Use the fireplace as a light source, not just a focal point
If the room has a fireplace, light it on decorating nights even if the heat is not needed. The dancing light from a real fire adds movement and warmth that no string light can replicate. For a gas fireplace, keep the flame low and steady. For a decorative fireplace or one blocked by a screen, place a cluster of pillar candles in varying heights inside the firebox (never unattended).
24. Add one floor lamp near the tree for reading-area warmth
A warm-shaded floor lamp placed to the side and slightly behind the tree fills the corner with ambient light that complements the tree lights without washing them out. Aim for a 2700K bulb to match the color temperature of warm white LED tree lights.
25. Use battery-operated candles on the mantel with a timer
Real taper candles on a mantel look beautiful but require supervision. High-quality battery-operated tapers with a real-wax surface and flame-flicker mode are nearly indistinguishable from the real thing and can safely run on a timer throughout the holiday season. Set the timer to turn on 30 minutes before your household typically gathers in the living room.
Color strategies for the living room
26. Classic red and forest green
This is the highest-contrast option and the one that reads most strongly as Christmas from across the room. Deep merlot red tree ornaments, forest green garland, and warm brass accents anchor the palette. Limit the red to the tree and mantel zone. Use green as the structural element in garlands, wreaths, and the tree skirt. Brass or antique gold in candlesticks, frames, and ornament caps carries the warmth between the two.
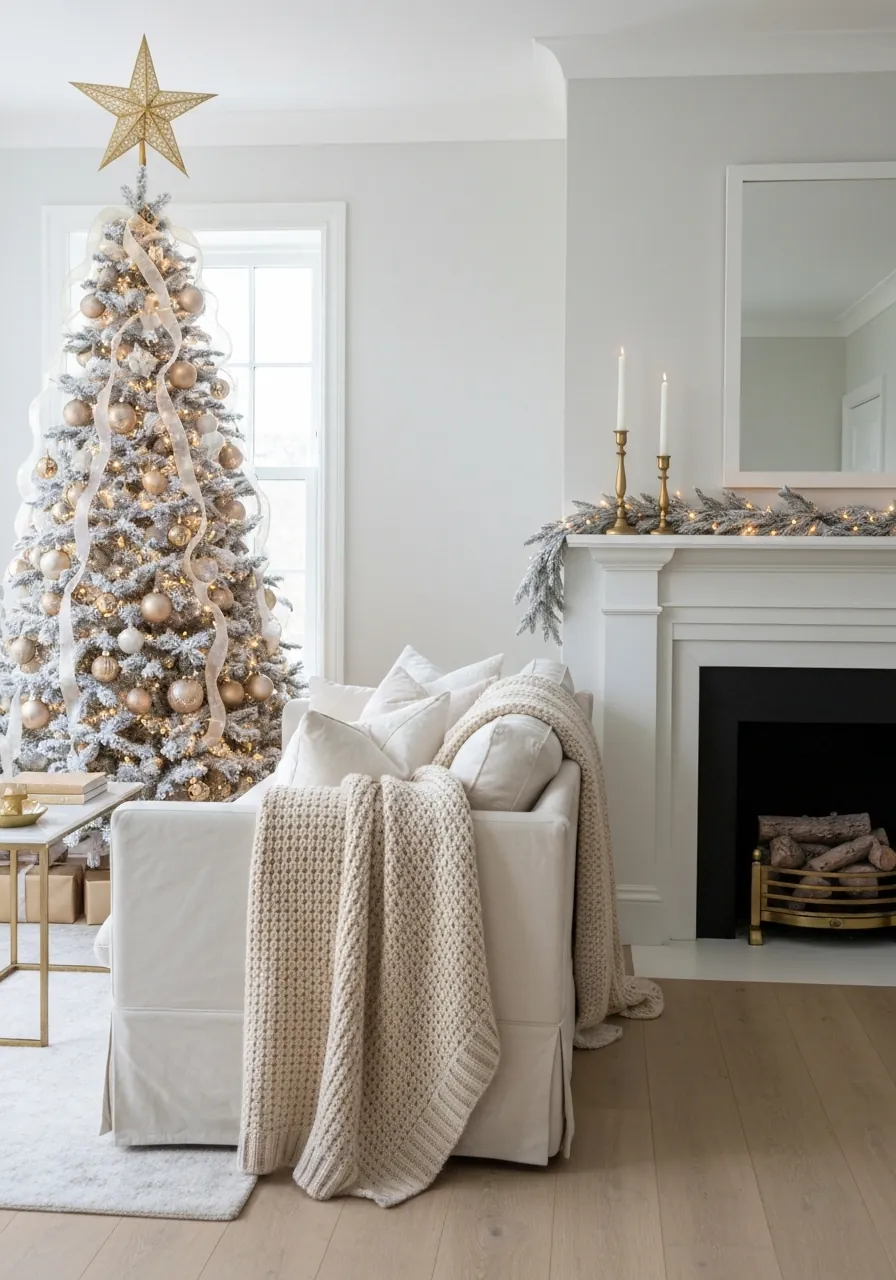
27. White and gold winter wonderland
A white-flocked tree with gold ornaments and champagne ribbon creates a quieter, more ethereal palette for living rooms with neutral walls and light wood floors. Add warmth through texture, ivory knit throws, linen cushions, wood candleholders, and natural seagrass elements. This palette photographs particularly well in natural daytime light.
28. Blush, cream, and sage green
An unconventional palette that reads festive without the traditional red-green contrast. Blush velvet ornaments, cream ribbon, sage eucalyptus garland, and dusty rose candles work particularly well in living rooms with warm greige or terra cotta walls. Add brushed gold hardware and a neutral linen tree skirt to anchor it.